Perfect Aire 3PAMSCH18 Manual
Perfect Aire
Air conditioning
3PAMSCH18
Read below 📖 the manual in Italian for Perfect Aire 3PAMSCH18 (23 pages) in the Air conditioning category. This guide has been helpful for 21 people and has been rated 4.5 stars on average by 2 users
Page 1/23
MULTI-ZONE
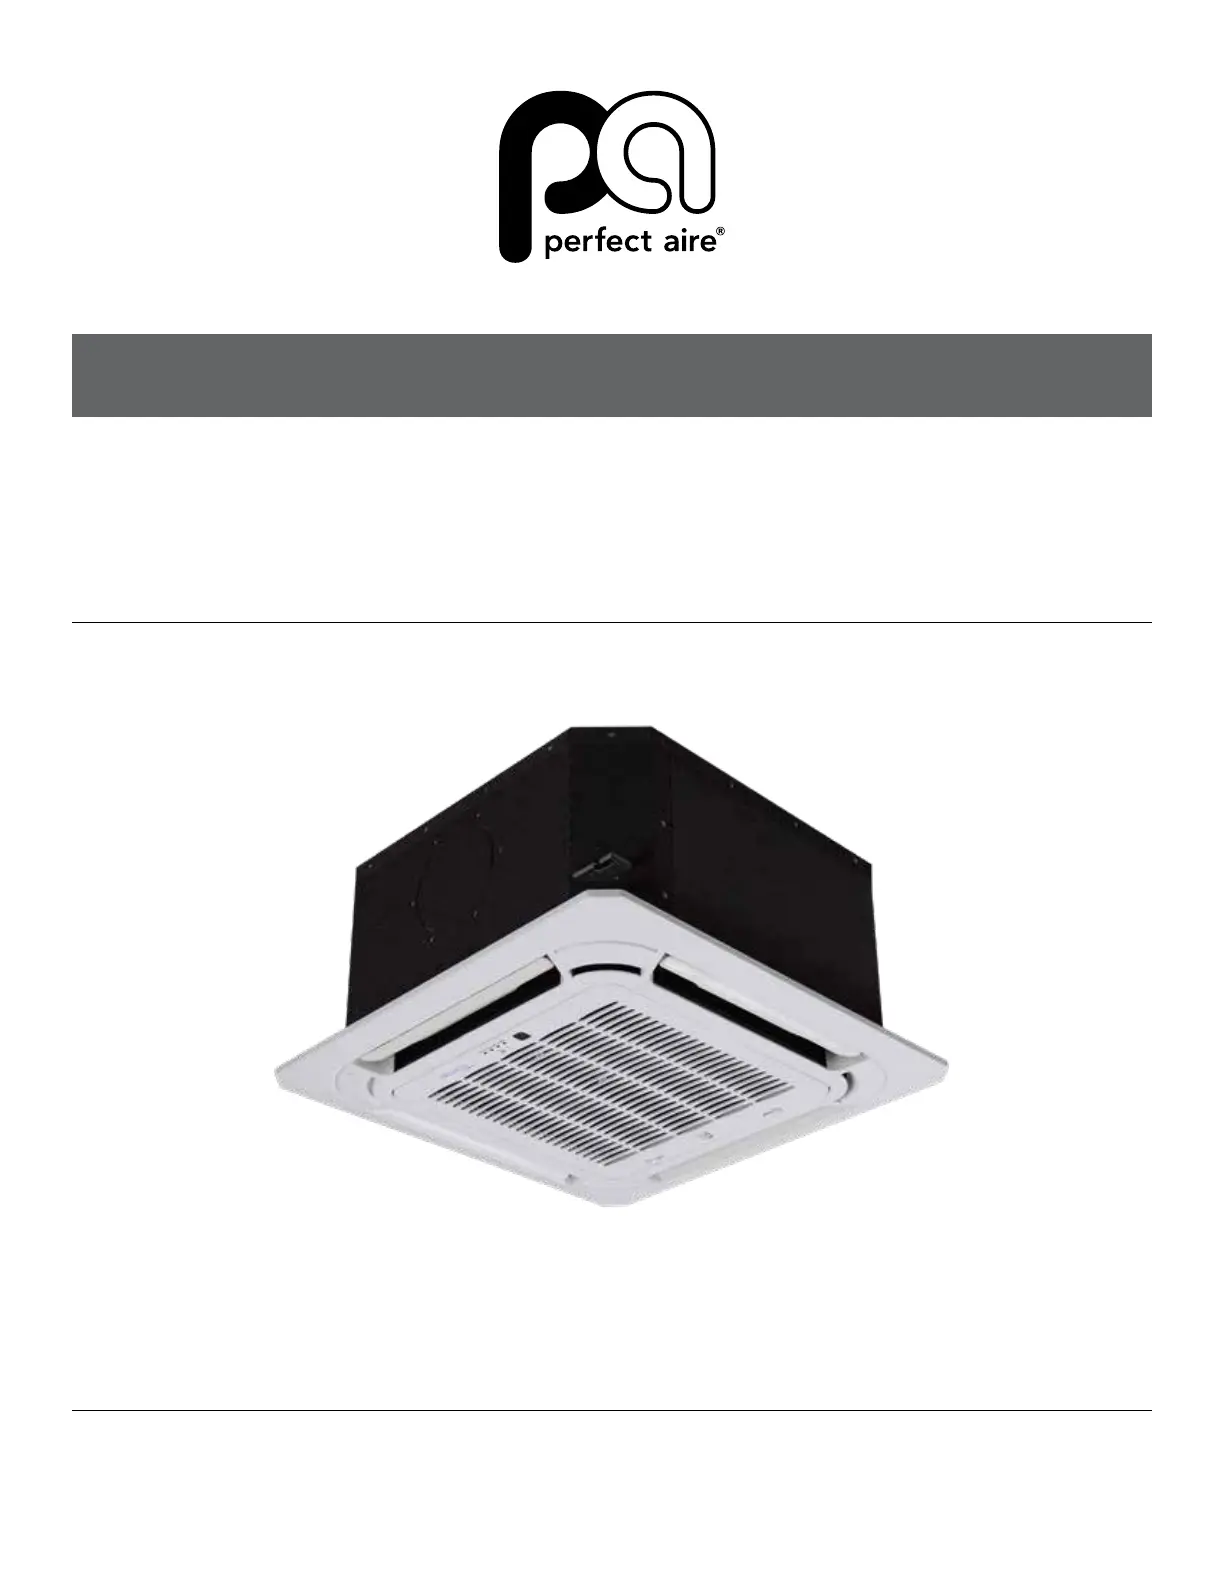
FOUR-WAY CASSETTE
OWNER’S MANUAL
Image shown is the 3PAMSCH12, 3PAMSCH18
MODELS: 3PAMSCH12, 3PAMSCH18, 3PAMSCH24

32
TABLE OF CONTENTS
IMPORTANT NOTE:
Read this manual and SAFETY MANUAL(if any) carefully before installing or operating your new air
conditioning unit. Make sure to save this manual for future reference.
Please check the applicable models, technical data, F-GAS (if any) and manufacturer information from the
“Owner’s Manual - Product Fiche” in the packaging of the outdoor unit (European Union products only) or in
the packaging of the indoor unit (model dependent)
PACKING AND UNPACKING THE UNIT ........................................................................................... 5
SAFETY PRECAUTIONS .................................................................................................................... 6
BEST INSTALLATION PRACTICES .......................................................................................................................................... 9
UNIT SPECIFICATIONS AND FEATURES .....................................................................................10
INDOOR UNIT DISPLAY ............................................................................................................................................................10
OPERATING TEMPERATURE ..................................................................................................................................................11
OTHER FEATURES ......................................................................................................................................................................12
CARE AND MAINTENANCE .............................................................................................................13
CLEANING YOUR INDOOR UNIT ...........................................................................................................................................13
CLEANING YOUR AIR FILTER ..................................................................................................................................................13
MAINTENANCE – LONG PERIODS OF NON-USE ............................................................................................................14
MAINTENANCE – PRE-SEASON INSPECTION .................................................................................................................14
TROUBLESHOOTING........................................................................................................................15
COMMON ISSUES ......................................................................................................................................................................15
TROUBLESHOOTING ................................................................................................................................................................16
ACCESSORIES ...................................................................................................................................18
INSTALLATION SUMMARY ............................................................................................................19
UNIT PARTS ........................................................................................................................................20
3PAMSCH12 & 3PAMSCH18 ..................................................................................................................................................20
3PAMSCH24 .................................................................................................................................................................................21
INDOOR UNIT INSTALLATION .......................................................................................................22
STEP 1: SELECT INSTALLATION LOCATION ................................................................................................................................................... 22
STEP 2: HANG INDOOR UNIT .................................................................................................................................................................................. 23
STEP 3: DRILL WALL HOLE FOR CONNECTIVE PIPING .............................................................................................................................25
STEP 4: CONNECT DRAIN HOSE ........................................................................................................................................................................... 25
OUTDOOR UNIT INSTALLATION ...................................................................................................28
STEP 1: SELECT INSTALLATION LOCATION ................................................................................................................................................... 28
STEP 2: INSTALL DRAIN JOINT ............................................................................................................................................................................. 29
STEP 3: ANCHOR OUTDOOR UNIT ....................................................................................................................................................................... 29
REFRIGERANT PIPING CONNECTION .........................................................................................31
NOTE ON PIPE LENGTH ...........................................................................................................................................................31
CONNECTION INSTRUCTIONS – REFRIGERANT PIPING ............................................................................................32
STEP 1: CUT PIPES ....................................................................................................................................................................................................... 32
STEP 2: REMOVE BURRS ........................................................................................................................................................................................... 32
STEP 3: FLARE PIPE ENDS ........................................................................................................................................................................................ 32
STEP 4: CONNECT PIPES .......................................................................................................................................................................................... 33
INSTALLATION MANUAL
OWNER’S MANUAL

4 5
SAFETY & PRECAUTIONS
TABLE OF CONTENTS
(Continued)
WIRING .................................................................................................................................................35
OUTDOOR UNIT WIRING ..........................................................................................................................................................36
CHOOSE THE RIGHT CABLE SIZE ........................................................................................................................................36
INDOOR UNIT WIRING ..............................................................................................................................................................36
AIR EVACUATION ..............................................................................................................................38
PREPARATIONS AND PRECAUTIONS .................................................................................................................................38
EVACUATION INSTRUCTIONS ...............................................................................................................................................38
NOTE ON ADDING REFRIGERANT........................................................................................................................................39
PANEL INSTALLATION .....................................................................................................................40
3PAMSCH12 & 3PAMSCH18 ..................................................................................................................................................40
STEP 1: REMOVE THE FRONT GRILLE ................................................................................................................................................................ 40
STEP 2: INSTALL THE PANEL .................................................................................................................................................................................. 40
STEP 3: MOUNT THE INTAKE GRILLE ................................................................................................................................................................. 40
STEP 4: CONNECT WIRES ......................................................................................................................................................................................... 40
STEP 5: FASTEN CONTROL BOX LID ................................................................................................................................................................... 40
STEP 6: CLOSE INTAKE GRILLE ............................................................................................................................................................................. 40
3PAMSCH24 .................................................................................................................................................................................41
STEP 1: REMOVE THE FRONT GRILLE ................................................................................................................................................................ 41
STEP 2: REMOVE INSTALLATION COVERS ......................................................................................................................................................41
STEP 3: INSTALL THE PANEL .................................................................................................................................................................................. 41
STEP 4: HANG THE INTAKE GRILLE ..................................................................................................................................................................... 42
STEP 5: RE-INSTALLED INTO STYLE GRID ...................................................................................................................................................... 42
TEST RUN ............................................................................................................................................43
BEFORE TEST RUN ....................................................................................................................................................................43
TEST RUN INSTRUCTIONS .....................................................................................................................................................43
INSTALLATION MANUAL CONTINUED
PACKING AND UNPACKING THE UNIT
INSTRUCTIONS FOR PACKING AND UNPACKING THE UNIT:
UNPACKING:
Indoor unit:
Cut the packing belt.
Unpack the package.
Take out the packing cushion and packing
support.
Remove the packing lm.
Take out the accessories.
Lift the machine out and lay it at.
Outdoor Unit:
Cut the packing belt.
Take the unit out of the carton.
Remove the foam from the unit.
Remove the packaging bag from the unit.
PACKING:
Indoor unit:
Put the indoor unit into the packing lm.
Put the accessories in.
Place the packing cushion and packing
support.
Put the indoor unit into the package.
Close the package and seal it.
Using the packing belt if necessary.
Outdoor unit:
Put the outdoor unit into the packing lm.
Put the bottom foam into the box.
Put the outdoor unit into the package, then
put the upper packaging foam on the unit.
Close the package and seal it.
Using the packing belt if necessary.
NOTE: Please keep all packaging items if you
may need in the future.
Product Specifications
| Brand: | Perfect Aire |
| Category: | Air conditioning |
| Model: | 3PAMSCH18 |
Do you need help?
If you need help with Perfect Aire 3PAMSCH18, ask a question below and other users will answer you
Air conditioning Perfect Aire User Manuals

13 October 2024
13 October 2024
13 October 2024
13 October 2024
13 October 2024
13 October 2024
13 October 2024
13 October 2024
13 October 2024
13 October 2024
Air conditioning User Manuals
- Air conditioning Candy
- Air conditioning Electrolux
- Air conditioning Samsung
- Air conditioning LG
- Air conditioning Panasonic
- Air conditioning Delonghi
- Air conditioning Koldfront
- Air conditioning Arcelik
- Air conditioning Danby
- Air conditioning Hisense
- Air conditioning Gree
- Air conditioning TCL
- Air conditioning Hotpoint
- Air conditioning Whirlpool
- Air conditioning Cecotec
- Air conditioning Comfee
- Air conditioning Kogan
- Air conditioning SereneLife
- Air conditioning Create
- Air conditioning Midea
- Air conditioning Sauber
- Air conditioning Haier
- Air conditioning Olimpia Splendid
- Air conditioning Westinghouse
- Air conditioning Sencor
- Air conditioning Electroline
- Air conditioning Fujitsu
- Air conditioning Orava
- Air conditioning Mistral
- Air conditioning Khind
- Air conditioning Amana
- Air conditioning Dimplex
- Air conditioning Whynter
- Air conditioning GE
- Air conditioning Hitachi
- Air conditioning Hyundai
- Air conditioning VänEE
- Air conditioning Daikin
- Air conditioning Be Cool
- Air conditioning Avidsen
- Air conditioning Mitsubishi
- Air conditioning Friedrich
- Air conditioning Tristar
- Air conditioning Dometic
- Air conditioning Eldom
- Air conditioning Elba
- Air conditioning Philco
- Air conditioning Black And Decker
- Air conditioning Wilfa
- Air conditioning Heinner
- Air conditioning SEEGER
- Air conditioning IFB
- Air conditioning Duracraft
- Air conditioning Home Electric
- Air conditioning Milectric
- Air conditioning LERAN
- Air conditioning Argoclima
- Air conditioning ARCTIC WIND
- Air conditioning Trisa
- Air conditioning Daizuki
- Air conditioning Mayer
- Air conditioning Be Quiet!
- Air conditioning BOSFOR
- Air conditioning KDK
- Air conditioning Aconatic
- Air conditioning AireMax
- Air conditioning Profile
- Air conditioning Keystone
- Air conditioning Honeywell
- Air conditioning Ravanson
- Air conditioning ActronAir
- Air conditioning Woods
- Air conditioning Aspes
- Air conditioning Fuave
- Air conditioning Yamazen
- Air conditioning Cool-Space
- Air conditioning GoldAir
- Air conditioning KuulAire
- Air conditioning SHE
- Air conditioning BLUEPALM
Latest Air conditioning User Manuals

27 October 2024
27 October 2024
27 October 2024
27 October 2024
27 October 2024
27 October 2024

27 October 2024
27 October 2024
26 October 2024
26 October 2024